Friday 12 June 2015

FETCH ASSETS BASED ON TAG

                   
FETCH ASSETS BASED ON TAG

TAGTag is a keyword or label that can be assigned to any content. Multiple tags can be assigned to a content element, which allows to classify them by several different categorizations at the same time,

                                             LET START TAGGING IN CQ
  • Open Tag Manager:http://localhost:4502/tagging.
  • Click on NEW and Create Namespace (folder where all your tag will be there)
  • Click on the Namespace And Create NEW Tag by giving the name:(like Video,Image) as shown below with TagID.

TAGGING IMAGE1


  • Time to assign Created Tag to any of your assets(like images,video,pdf,pages etc)
  • The below image show how to assign tag to Page.


  • Click on  Properties Dialog will Popup ,on basic Tab Tag Field will be there.
  • Click on that and Search Your Namespace where You create Tags.
  • Click on tag (i.e video or Image)

  • Click ok.Your First tag Assigned to Page.
  • In the same way you can assigned as many tag as you want.
  • Now Time To Fetch all asset link assigned to particular Tag.
  • Create Component and Create Dialog which has select option as below


Dialog Have Following Properties

SELECT NODE:
         name:                                  ./select
         type  :                                  select
         xtype:                                  selection
         jcrPrimaryType                   cq:Widget

OPTIONS:
         jcrPrimaryType                   cq:WidgetCollection

IMAGE:
         jcrPrimaryType                   nt:unstructured
         text:                                     IMAGE(whatever you want to display on the drop down select menu)
         value :                                 NEWTAGGING:Image(Tag ID)
       
VIDEO:
        jcrPrimaryType                   nt:unstructured
         text:                                     IMAGE(whatever you want to display on the drop down select menu)
         value :                                 NEWTAGGING:Video(Tag ID)

  • Copy and Paste Below code into .jsp file
                                                      CODE

      <%--

              Tag component.

              TAG

       --%>
                             <%@include file="/libs/foundation/global.jsp"%>
                          <%@page import="java.util.Iterator,
                                       com.day.cq.tagging.TagManager,
                                      com.day.cq.tagging.Tag
                                     ,org.apache.sling.api.resource.Resource " %>

         <%
                String searchTag = properties.get("select","");
          %><%=searchTag%></h1><%
               if(searchTag!=null)
              {
                 try{
                        TagManager tagManager = resourceResolver.adaptTo(TagManager.class);
                        Tag tag = tagManager.resolve(searchTag);
                         Iterator<Resource> tags= tag.find(); 
                         %><h1><%=tag%><br><%=tags%><br><%=searchTag%></h1><%
                         while(tags.hasNext())
                                   {
                                      Resource resource1 = tags.next();
                                      String path = resource1.getPath();
                                          %>
                                     <h1> <%= path%> </h1>
                                     <h5><%=tag.getDescription()%></h5>
                                    <%
                                  }
                         }
                catch(Exception e)
                       {
                            System.out.println("Exception is "+e);
                        }
               }
       %>


  • Drag and Drop Component on Parsys.
  • Double click on it and  it will show two select category select one and press ok.
  • Following Output will be Observed


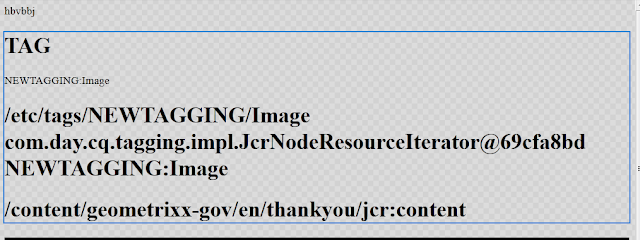
  • first show location of your tag
  • Third one Id of your Tag
  • Fourth one is path of that assets where you can fetch it by using path.


Monday 25 May 2015

How can I configure the PDF rewriter?

Overview

CQ has a built in rewriter that automatically renders a page as a PDF through Apache FOP (with
composition defined in XSL) whenever the extension .pdf is requested. Creating a script in a template
component with the name pdf.<script extension>, such as pdf.jsp, can override this, but then the pdf
must be manually created and delivered though a library such as Apache PDFBox. This document
instructs you how to use the out of the box functionality of CQ to configure the PDF rewriter.

Quickstart

The easiest method is to simply update the .xsl file used by default with CQ. This is found in the
repository at /libs/wcm/core/content/pdf/page2fo.xsl. Write the xslfo
and the xslt the way you would
normally. See the XSL section for more details.

OSGI

The actual code that runs the CQ PDF rewriter is contained in the OSGI bundle called "Day
Communique 5 Rewriter" (com.day.cq.cqrewriter).
Specifically, the package com.day.cq.rewriter.xml
within the bundle holds the classes relevant to PDF rewriting. These classes are called through two
different services in Apache Felix. One service controls the ComponentFactory and the other controls
the TransformerFactory. To do some of the customizations described here, you will need to modify
these bundles or services or create new bundles and services similar to these.

Rewriter Configuration

The rewriter configuration is found in the repository at /libs/cq/config/rewriter/pdf. More documentation
on this configuration can be found here. If you have added new bundles or services, or have renamed
the default services, this is where you must reconfigure sling to use the modified services. Note also
that, by default, the configuration node has two children, most importantly the child "transformerxslt."

This node contains a property called "source" which defines the path in which the transformer
Adobe CQ Blueprints

 How do I Render a Page as PDF? | Adobe CQ (AEM) Blueprints

http://www.cqblueprints.com/tipsandtricks/pdfrendering.html 2/4
searches for the .xsl file. The SourceResolver that controls the path search for this field is
com.day.cq.rewriter.xml.SourceResolverImpl, and allows the following namespaces:
file: Uses the org.apache.excalibur.source.factories.FileSourceFactory class, which searches the
server's file system.
resource: Uses the org.apache.excalibur.source.factories.ResourceSourceFactory class, which
searches the resources from the classloader.
sling: Uses the com.day.cq.rewriter.xml.SlingResourceSourceFactory class, which searches the
repository.

*: Uses the org.apache.excalibur.source.factories.URLSourceFactory class, which searches a url.
Note that, by default, you are only able to set a single .xsl file that will be used for all PDFs. See the
Allowing Multiple XSL Files for details on changing this.
XSL
The default location for the .xsl file controlling the pdf is /libs/wcm/core/content/pdf/page2fo.xsl. This
can be changed by modifying the rewriter configuration. The only parameter set by default is
"resource", which is a string that holds the current resource's path. If you need to get simply the
resource name, you can use this .xsl code to retrieve it.
//CALLED USING <xsl:calltemplate
name="trim"> //NOTE THAT THE 11
IS TO ELIMINATE THE
"/jcr_content" AT THE END OF THE STRING <xsl:withparam
name="str"><xsl:valueof
select="substring($resource,0,stringlength($
resource)11)"/></
xsl:withparam>
</xsl:calltemplate>
//USED FOR RECURSIVELY TRIMMING THE RESOURCE PARAM TO GET THE PAGE NAME
<xsl:template name="trim"> <xsl:param name="str" /> <xsl:choose> <xsl:when test="contains($str, '/')">
<xsl:calltemplate
name="trim"> <xsl:withparam
name="str"><xsl:valueof
select="substringafter($
str,
'/')"/></xsl:withparam>
</xsl:calltemplate>
</xsl:when> <xsl:otherwise> <xsl:valueof
select="$str"/>
</xsl:otherwise> </xsl:choose> </xsl:template>
To send additional parameters to the xsl, see the Adding Parameters section.
Allowing Multiple XSL Files
The CQ code controlling the rewriter have been hardcoded to look for the "source" property on the
"transformerxslt"
node (found at /libs/cq/config/rewriter/pdf/transformerxslt
by default). To allow
multiple .xsl files to be used based on some other consideration (notably the current resource's
"cq:template" or "sling:resourceType" properties), you must modify the
com.day.cq.rewriter.xml.XSLTTransformer class. Specifically for basing the xsl on the template, the init
method must change from simply getting "source" to finding out what template is used and searching
for the config for that template. For example,
public void init(ProcessingContext context, ProcessingComponentConfiguration config) thr
ows IOException
{
Node currentNode = context.getRequest().getResource().adaptTo(Node.class);
String template = currentNode.hasProperty("cq:template") ? currentNode.getPropert
4/21/2015 How do I Render a Page as PDF? | Adobe CQ (AEM) Blueprints
http://www.cqblueprints.com/tipsandtricks/pdfrendering.html 3/4
y("cq:template").getString() : "source";
template = template.substring(template.lastIndexOf("/")+1);
String src = (String)config.getConfiguration().get(template);
if (src == null)
src = (String)config.getConfiguration().get("source");
if (src == null)
throw new RuntimeException("Source is missing.");
this.resolver = new SourceResolverImpl(context.getRequest().getResourceResolver(), c
ontext.getRequest(), context.getResponse());
this.inputSource = this.resolver.resolveURI(src);
this.xsltProcessor = new XSLTProcessorImpl(this.resolver);
this.resource = context.getRequest().getResource();
}

Adding Parameters

The only parameter sent in the xsl request is the parameter "resource," which holds a string of the
current resource's path. In order to add additional parameters to the xsl request, you must modify the
com.day.cq.rewriter.xml.XSLTTransformer class. At the end of the "setContentHandler" method,
simply add code similar to this:
this.transformerHandler.getTransformer().setParameter("resourceName",
this.resource.adaptTo(Node.class).getName());
Then, in the .xsl file, simply include another parameter.
<xsl:param name="resourceName"/>

FETCH YOUTUBE VIDEO CHANNEL IN CQ

                               FETCHING YOUTUBE VIDEO CHANNEL PROGRAMATICALLY
                                                   USING JSON AND JQUERY USING
                                                                YOUTUBE DATA API


LET'S GET STARTED
  1. First of all you have to register into the below link to access Data API
      (If you already have Gmail account then directly Register it ,otherwise create google account)
        REGISTER IT ON YOUTUBE :Click for Register
      • Select a project, or create a new one.


      • In the sidebar on the left, expand APIs & auth. Next, click APIs. In the list of APIs, make sure the status is ON for the YouTube Data API v3


      • Click YouTube Data API
      • YouTube Data Api Must be Enable


      • In the sidebar on the left, select Credentials.
      • The API supports two types of credentials. Create whichever credentials are appropriate for your project:
          • OAuth 2.0: Your application must send an OAuth 2.0 token with any request that accesses private user data. Your application sends a client ID and, possibly, a client secret to obtain a token. You can generate OAuth 2.0 credentials for web applications, service accounts, or installed applications.
          • API keys: A request that does not provide an OAuth 2.0 token must send an API key. The key identifies your project and provides API access, quota, and reports.
      • Click on Credential and select Create new Key in Public API Access
      • Without Filling any IP on the Text-box will access to all IP otherwise you can provide it.
      • Then go to API (there will be three option after enabling Youtube Data API-Learn More,Explore this API,View reports in API Console)
      • Click on Explore this API


      • Choose API based on the Requirement (ex.-youtube.search.list )
      • You will see Form Like below-


      • In the part=snippet
      • ,channelD=some channelID(ex- UcaOR83TrtZEpOXJZdtnZtqA)
      • And Fill various filter According to the requirement
      • And click on Execute ,it
      • then you will find the URL
        Ex-https://www.googleapis.com/youtube/v3/search?part=snippet&channelId=UCaOR83TrtZEpOXJZdtnZtqA&key={YOUR_API_KEY}
      • And one Response will be generated like below that is in JSON format


                                                           JSON DATA RESPONSE


{
 "kind": "youtube#searchListResponse",
 "etag": "\"NO6QTeg0-3ShswIeqLchQ_mzWJs/0f_A59Ltuor31NjG3FFeIStM6Lc\"",
 "nextPageToken": "CAUQAA",
 "pageInfo": {
  "totalResults": 1484,
  "resultsPerPage": 5
 },
 "items": [
  {
   "kind": "youtube#searchResult",
   "etag": "\"NO6QTeg0-3ShswIeqLchQ_mzWJs/eXmUJRwHXNgBWdw4xWEh0eATTWs\"",
   "id": {
    "kind": "youtube#video",
    "videoId": "APJxwxZuA0E"
   },
   "snippet": {
    "publishedAt": "2012-04-05T10:08:52.000Z",
    "channelId": "UC56gTxNs4f9xZ7Pa2i5xNzg",
    "title": "Nenjodu Cherthu : Yuvvh Official HD Full Song",
    "description": "Watch Nenjodu Cherthu Official Full Song Video from
 the Album Yuvvh Song : Nenjodu Cherthu Album : Yuvvh Singer : Alaap 
Raju Music by : Sachin and ...",
    "thumbnails": {
     "default": {
      "url": "https://i.ytimg.com/vi/APJxwxZuA0E/default.jpg"
     },
     "medium": {
      "url": "https://i.ytimg.com/vi/APJxwxZuA0E/mqdefault.jpg"
     },
     "high": {
      "url": "https://i.ytimg.com/vi/APJxwxZuA0E/hqdefault.jpg"
     }
    },
    "channelTitle": "sonymusicindiaSME",
    "liveBroadcastContent": "none"
   }
  },
  {
   "kind": "youtube#searchResult",
   "etag": "\"NO6QTeg0-3ShswIeqLchQ_mzWJs/g4DgFSHepQIbXIGb42_Grze4IkQ\"",
   "id": {
    "kind": "youtube#video",
    "videoId": "snb-h8zKE6M"
   },
   "snippet": {
    "publishedAt": "2015-01-27T04:30:59.000Z",
    "channelId": "UC56gTxNs4f9xZ7Pa2i5xNzg",
    "title": "Ammy Virk - Taara | Album - Shayar | 
      Latest Punjabi Song 2015",
    "description": "Presenting \"Taara\" - The Love Song of season 
     by Ammy Virk. Song has been penned down by Jaani & Music/ 
     Composition has been given by ace music ...",
    "thumbnails": {
     "default": {
      "url": "https://i.ytimg.com/vi/snb-h8zKE6M/default.jpg"
     },
     "medium": {
      "url": "https://i.ytimg.com/vi/snb-h8zKE6M/mqdefault.jpg"
     },
     "high": {
      "url": "https://i.ytimg.com/vi/snb-h8zKE6M/hqdefault.jpg"
     }
    },
    "channelTitle": "sonymusicindiaSME",
    "liveBroadcastContent": "none"
   }
  },
  {
   "kind": "youtube#searchResult",
   "etag": "\"NO6QTeg0-3ShswIeqLchQ_mzWJs/nuZK9fIch8-JD2zwMCt-N34xEm8\"",
   "id": {
    "kind": "youtube#video",
    "videoId": "WxjQ0TjOOQI"
   },
   "snippet": {
    "publishedAt": "2014-09-29T11:01:19.000Z",
    "channelId": "UC56gTxNs4f9xZ7Pa2i5xNzg",
    "title": "A. R. Rahman, Kapil Sibal, 
     Lata Mangeshkar – Laadli | Raunaq",
    "description": "Dedicated to #VogueEmpower - 'Laadli' is the 
     Raunaq of Life and reflects the theme of women's empowerment.
     Kapil Sibal's moving poetry is set to melodious ...",
    "thumbnails": {
     "default": {
      "url": "https://i.ytimg.com/vi/WxjQ0TjOOQI/default.jpg"
     },
     "medium": {
      "url": "https://i.ytimg.com/vi/WxjQ0TjOOQI/mqdefault.jpg"
     },
     "high": {
      "url": "https://i.ytimg.com/vi/WxjQ0TjOOQI/hqdefault.jpg"
     }
    },
    "channelTitle": "sonymusicindiaSME",
    "liveBroadcastContent": "none"
   }
  },
  {
   "kind": "youtube#searchResult",
   "etag": "\"NO6QTeg0-3ShswIeqLchQ_mzWJs/OBob1tFMQXwTz3itkr9ZXNXl5Is\"",
   "id": {
    "kind": "youtube#video",
    "videoId": "YR12Z8f1Dh8"
   },
   "snippet": {
    "publishedAt": "2011-11-16T19:17:03.000Z",
    "channelId": "UC56gTxNs4f9xZ7Pa2i5xNzg",
    "title": "Why This Kolaveri Di Official Video | Dhanush, Anirudh",
    "description": "Check out the exclusive video, shot during the
     recording of the song \"why this kolaveri di\" with the music composer 
     Anirudh,Dhanush,Shruti Hassan, Aishwarya ...",
    "thumbnails": {
     "default": {
      "url": "https://i.ytimg.com/vi/YR12Z8f1Dh8/default.jpg"
     },
     "medium": {
      "url": "https://i.ytimg.com/vi/YR12Z8f1Dh8/mqdefault.jpg"
     },
     "high": {
      "url": "https://i.ytimg.com/vi/YR12Z8f1Dh8/hqdefault.jpg"
     }
    },
    "channelTitle": "sonymusicindiaSME",
    "liveBroadcastContent": "none"
   }
  },
  {
   "kind": "youtube#searchResult",
   "etag": "\"NO6QTeg0-3ShswIeqLchQ_mzWJs/TJwMquQUFAR55NcpDz7p33NgO9Q\"",
   "id": {
    "kind": "youtube#video",
    "videoId": "hG6uc9icebI"
   },
   "snippet": {
    "publishedAt": "2015-04-03T18:30:14.000Z",
    "channelId": "UC56gTxNs4f9xZ7Pa2i5xNzg",
    "title": "OK Kanmani | OK Bangaram - Maula Wa Sallim Lyric Video | 
A.R. Rahman, Mani Ratnam",
    "description": "Listen to Maula Wa Sallim in A.R. Ameen's voice from
        OK Kanmani / OK Bangaram. Song Name - Maula Wa Sallim Movie - 
        Ok Kanmani / OK Bangaram Singer ...",
    "thumbnails": {
     "default": {
      "url": "https://i.ytimg.com/vi/hG6uc9icebI/default.jpg"
     },
     "medium": {
      "url": "https://i.ytimg.com/vi/hG6uc9icebI/mqdefault.jpg"
     },
     "high": {
      "url": "https://i.ytimg.com/vi/hG6uc9icebI/hqdefault.jpg"
     }
    },
    "channelTitle": "sonymusicindiaSME",
    "liveBroadcastContent": "none"
   }
  }
 ]
}
      • Paste the URL by editing Your_API_Key to your original Key
        on the browser
      • Same Result you will Get As A JSON formet
      • Then you need to fetch those results by using jquery
      • In cq you can fetch the channelId,Api-Key and no of results 
        throug dialog as shown below...
      •  
        • Below is the jquery code to fetch your required video and 
        display into iframe and copy paste the code into the jsp
        file of the component
        
         
        Component Code 

<head>
<link href="http://ajax.googleapis.com/ajax/libs/jqueryui/1.8/themes/base/jquery-ui.css" rel="stylesheet" type="text/css"/>
<script src="http://ajax.googleapis.com/ajax/libs/jquery/1.5/jquery.min.js"></script>
<script src="http://ajax.googleapis.com/ajax/libs/jqueryui/1.8/jquery-ui.min.js"></script>
<script>
$(document).ready(function()
{

$(window).load(function(value)
{
var yurl = $("#yurl").val();
alert(yurl);

var request = $.ajax({
url: yurl,
method:'GET',
dataType:'json',
success: function(data) {
var object = data;
var output;
for (var i=0; i<2; i++){
output+='<li>'
output+='<img id="u0_img" src="'+object.items[i].snippet.thumbnails.default.url+'">'
output+='</li>'
}
output+='</ul>'
document.getElementById("images").innerHTML=output;
}

});
});

});
</script>
<style>
#u0_img {
display: inline-table;
height: 213px;
left: 0;
position: relative;
text-decoration: none;
top: 0;
width: 400px;
}
.ax_image {
color: #000000;
font-family: "ArialMT","Arial";
font-size: 13px;
font-style: normal;
font-weight: 400;
line-height: normal;
text-align: center;
}
</style>
</head>
<%@include file="/libs/foundation/global.jsp"%>
<%@page session="false"%>
<%
String apikey = properties.get("apikey",String.class);
String channelId = properties.get("channelid",String.class);
String maxNum = properties.get("maxresults",String.class);
String url = String.format("https://www.googleapis.com/youtube/v3/search? part=snippet&channelId=%s&maxResults=%s&order=date&key= %s",channelId,maxNum, apikey);


%>
<input type="hidden" value="<%=url%>" id="yurl"/>
<div id="images" class="ax_image">
</div>


      • Go to edit mode of sidekick and include your Component Group
      • Drag and Drop the Component into the parsys.
      • Double click on the comonent so that it will pop up dialog
      • Fill the entries like API_KEY,Channel_Name,Maximum_Result


      • Results will be Shown like Below You can Customise It according to your condition by adding CSS and JavaScript


      • YouTube video is included into your Page.

NOTE: You can fetch various data from json according to your requirement, in the above Example I am only fetching video_id and embedding into the iframe.